Intraoral cameras are an essential tool for modern dental practices. These devices offer clear and detailed images of the oral cavity to support accurate diagnoses and effective treatment planning. For dental professionals seeking affordable and high-quality options, ProDENT provides reliable and cost-efficient solutions.
This article explores the best budget-friendly intraoral cameras available, including ProDENT's PD740, a top choice for dental imaging.
| Camera |
Key Features |
Compatibility |
Resolution |
Lens Type |
| ProDENT PD740 |
High-res 3.8 MP, autofocus; anti-fog; free imaging software |
Windows, Dexis, Apteryx, and Eaglesoft |
3.8 MP (static); 1.3 MP (dynamic) |
Autofocus |
| MouthWatch |
Single-button capture; supports 50+ software, ergonomic |
Eaglesoft, Apteryx, and more |
Not specified |
Fixed-focus |
| Dentulu MouthCAM |
Wired/wireless; cloud storage; compact design |
Smartphone app |
Not specified |
Not specified |
| DARYOU DY-50 |
High-res 1600x1200; ergonomic; anti-fog |
Dexis, Eaglesoft, and Carestream |
1600x1200 |
Autofocus |
| TELICAM |
Fixed focus; plug-and-play functionality |
Dexis, Apteryx, and Carestream |
Not specified |
Fixed-focus |
Key Takeaways
- Intraoral cameras improve diagnostic accuracy and patient communication in dentistry
- ProDENT's PD740 offers excellent value with clear images and compatibility with dental software
- Affordable options like MouthWatch and Dentulu MouthCAM enhance dental workflows
- Key features to look for include USB connectivity, fixed focus lenses, and compatibility with dental imaging systems
- Affordable intraoral cameras reduce costs while maintaining high-quality performance
ProDENT Dental Intraoral Camera PD740 – Amazon Editor's Choice
The ProDENT PD740 Intraoral Camera is an excellent investment for dental practices due to its combination of affordability, ease of use, and outstanding image quality. With a plug-and-play USB setup and compatibility with popular dental imaging software like Dexis and Apteryx, this camera integrates seamlessly into any dental workflow.
Key Features
- High-resolution imaging up to 3.8 million pixels for clear diagnosis
- Autofocus lens with anti-fog technology and wide-angle view
- Free imaging software to capture, edit, and save patient images
- Compatible with Eaglesoft, PracticeWorks, SoftDent, and more
- Durable design with a protective magnetic holder and easy maintenance
- Intraoral camera price: $199.00
| Feature |
Details |
| Image Format |
JPEG |
| Focus Type |
Auto-focus |
| Pixels |
3.8 million (static), 1.3 million (dynamic) |
| USB Connection |
Plug & Play |
| Compatibility |
Windows 7/8/10 |
This dental intraoral camera is a reliable choice for dentists seeking a low-cost yet high-performing option for capturing quality intraoral images.
MouthWatch Intraoral Camera
The MouthWatch Intraoral Camera is a lightweight, ergonomic option that simplifies capturing intraoral images. With six bright LEDs and a fixed-focus lens, it ensures crystal-clear images for accurate diagnoses and patient education.
Key Features
- Quick single-button capture saves images directly to patient charts
- Compatible with over 50 imaging software options, including Eaglesoft and Apteryx
- Lifetime customer support for seamless setup and troubleshooting
The MouthWatch intraoral camera is ideal for dental professionals looking for a reliable tool for patient education and documentation. This is a more simplified option to make the entire imaging process a little easier.
Dentulu's MouthCAM
The Dentulu MouthCAM combines affordability and functionality, offering wired and wireless options for versatile use. Its compact design makes it perfect for both professional and at-home applications.
Key Features
- Affordable payment plans and hassle-free setup
- Cloud-based image storage accessible through a smartphone app
- Early detection of oral health issues with secure sharing options
This dental camera is excellent for patient education and preventive care, supporting the early detection of gum disease and other oral health concerns.
DARYOU DY-50 Intraoral Camera
The DARYOU DY-50 is a robust and cost-effective option for dental offices, offering integration with a wide range of dental imaging software.
Key Features
- High-resolution images (1600x1200) with autofocus functionality
- Compatible with popular software like Dexis, Eaglesoft, and Carestream
- Ergonomic design for easy handling and clear imaging
With its straightforward USB connectivity and antifog lens, the DY-50 is a dependable tool for enhancing case acceptance and treatment planning.
TELICAM Intraoral Camera
The TELICAM Intraoral Camera provides crisp images at an affordable price, making it a practical choice for dental offices.
Key Features
- Fixed focus lens ensures consistent image quality
- Plug-and-play functionality with Windows-based systems
- Compatible with imaging software like Dexis, Apteryx, and Carestream
This camera is perfect for capturing images and videos of teeth and gums, enabling effective patient education and documentation.
ProDENT: Professional Intraoral Cameras For Your Practice
ProDENT's intraoral cameras are designed to meet the needs of modern dental practices. With competitive pricing and advanced features, the ProDENT PD740 stands out as a reliable and cost-effective option.
From clear images to seamless software integration, ProDENT helps dental professionals enhance their workflows without exceeding their budgets. If you want to improve your practice’s dental diagnoses, try our professional intraoral cameras at affordable prices. Contact us to find out more!
Most Affordable Intraoral Cameras for Your Dental Practice FAQs
Why would a dentist use an intraoral camera?
A dentist uses an intraoral camera to capture detailed images of the oral cavity, helping to improve diagnosis and treatment planning. A quality intraoral camera, such as an HD intraoral camera, allows dentists to visually educate patients on dental conditions like cavities or gum disease, improving case acceptance. Modern dental camera intraoral devices are available at a low cost, making them accessible tools for enhancing patient care and oral hygiene. Additionally, intraoral camera costs are quite affordable!
What is an intraoral scanner in dentistry?
An intraoral scanner is a device used in digital dentistry to create precise 3D digital impressions of a patient’s teeth and gums. Unlike traditional impression materials, scanners like Medit provide high accuracy and comfort for patients. These devices support procedures like crowns, aligners, and implants. The best intraoral scanner models integrate seamlessly with dental products and systems, streamlining workflows for digital intraoral imaging and treatment planning.
How long does an intraoral scan take?
An intraoral scan typically takes 2 to 5 minutes to complete, depending on the best digital dentistry device being used. Devices like the best dental intraoral cameras or best intraoral scanners ensure quick and accurate results, minimizing chair time. These advanced tools, such as a camera intraoral dental, otherwise known as an intraoral camera dental, are ideal for providing patients with efficient and precise care.
Back to Top: Most Affordable Intraoral Cameras for Your Dental Practice
Oral cancer screening involves methods to detect cancer in the mouth and throat early. Early detection improves treatment outcomes and survival rates. Oral cancer can manifest in different forms, including cancers of the lip, tongue, and other areas within the oral cavity. Regular screenings help identify abnormal tissues before they develop into more serious conditions.
In this article, we dive into oral cancer screenings, how to check for mouth cancer, and more. At ProDENT, we emphasize the importance of comprehensive oral screenings with the help of intraoral cameras. This technique facilitates early diagnosis and effective treatment.
Key Takeaways
- Oral cancer screening is vital for early detection and better treatment outcomes.
- Symptoms of oral cancer include persistent sores and changes in mouth tissues.
- The screening process involves visual examinations and advanced techniques.
- Intraoral cameras enhance the accuracy of oral examinations.
- Regular oral screening for mouth cancer can significantly reduce the risk of advanced oral cancers.
What is Oral Cancer?
Oral cancer refers to malignant growths that occur in the mouth, including cancers of the lips, tongue, cheeks, gums, and roof or floor of the mouth. It is a type of head and neck cancer that can affect various tissues within the oral cavity. The most common type of oral cancer is squamous cell carcinoma, which arises from the flat cells lining the mouth. Factors contributing to the risk of oral cancer include tobacco use, excessive alcohol consumption, HPV infection, and prolonged sun exposure to the lips.
Types of Oral Cancer
-
Lip Cancer: Often linked to sun exposure
-
Tongue Cancer: Can occur on the surface or under the tongue
-
Gum Cancer: Affects the tissue surrounding teeth
-
Floor of Mouth Cancer: Located beneath the tongue
-
Throat Cancer: Involves parts of the throat behind the mouth
What are the Symptoms of Oral Cancer?
Recognizing symptoms early can lead to fast diagnosis and treatment. Common signs of oral cancer include:
| Symptom |
Description |
| Persistent Sores |
Ulcers in the mouth that do not heal |
| White or Red Patches |
Unusual lesions on gums, tongue, or lining |
| Difficulty Swallowing |
Trouble chewing or swallowing food |
| Lump or Thickening |
Presence of lumps in mouth or neck |
| Changes in Voice |
Hoarseness or speech difficulties |
| Unexplained Bleeding |
Bleeding without an obvious cause |
| Persistent Pain |
Ongoing pain in mouth or throat |
If you notice any of these signs, it's essential to consult a dentist for an evaluation.
How do You Test for Mouth Cancer: Screening Test for Oral Cancer
The screening process for oral cancer typically begins with an oral exam performed by a dentist. This examination helps identify any abnormalities in the tissues of your mouth.
Steps Involved in Oral Cancer Screening
-
Visual Examination: The dentist inspects your entire mouth for any unusual lesions or discoloration.
-
Palpation: The dentist feels for lumps or irregularities in your neck and jaw area.
-
Advanced Techniques:
-
Toluidine Blue Dye Test: A blue dye is applied to highlight abnormal cells that may indicate precancerous changes.
-
Fluorescent Light Test: Special lights are used to help visualize abnormal tissue that may not be visible during a standard exam.
-
VELscope Examination: This device uses fluorescent light to detect changes in cellular structure indicative of potential cancer.
Follow-Up Tests
If abnormalities are found during screening, further diagnostic procedures may include biopsies or imaging tests:
-
Biopsy: Removing a small tissue sample for laboratory analysis to confirm whether cancer cells are present.
-
Imaging Tests: CT scans or MRIs may be used to determine if cancer has spread beyond its original site.
Why is it Important to Screen for Oral Cancer?
Screening for oral cancer is essential because early detection leads to better treatment options and higher survival rates. Many cases of oral cancer are diagnosed at an advanced stage when treatment options are limited and less effective.
Benefits of Regular Screening
- Identifies precancerous lesions before they develop into full-blown cancers
- Allows for timely intervention to improve prognosis
- Reduces mortality rates associated with advanced stages of oral cancer
- Provides peace of mind through regular monitoring
Organizations like the American Cancer Society recommend regular screenings as part of routine dental care.
How Intraoral Cameras Aid in Screening
Intraoral cameras are small, handheld devices that provide high-resolution images of the inside of your mouth. These cameras enhance traditional dental examinations by allowing dentists to see detailed images of hard-to-reach areas.
Advantages of Using Intraoral Cameras
- Improved visualization of abnormalities that may not be visible during a standard examination
- Improved patient education through visual aids that explain findings during exams
- Documentation capabilities that allow tracking changes over time
By incorporating intraoral cameras into routine screenings, dentists can more effectively look for signs of oral cancer and other dental issues.
ProDENT: Improve Dental Diagnoses With Intraoral Cameras
At ProDENT, we understand that early detection is key in battling oral cancers. Our use of intraoral cameras ensures comprehensive examinations that can help identify potential issues before they escalate into serious conditions. Regular dental visits combined with advanced technology like intraoral cameras improve your overall dental health and increase chances for successful outcomes if issues arise.
Contact us to ensure your patients receive the best oral health care!
FAQs on Oral Cancer Screening | How is Oral Cancer Detected?
Which oral cancer test confirms mouth cancer?
A biopsy is the definitive test that confirms oral cavity cancer by examining tissue for signs of cancer under a microscope. The National Cancer Institute notes that comprehensive cancer care often begins with tests that may include imaging and a physical exam to look for signs of cancer.
Is oral cancer screening worth it?
Oral cancer screening is worth it as early detection can improve outcomes, especially for lip and oral cavity cancer. Dentists or doctors may refer you to a specialist for further evaluation if they notice any signs of cancer during routine exams.
What is the three-finger test for oral cancer?
The three-finger test is a self-screening method to check for abnormalities in the roof of the mouth, tongue, and cheeks, which are common sites for oral cavity cancer. This method helps individuals identify any unusual changes early and seek cancer diagnosis and oral cavity cancer treatment if needed.
Back to Top: Oral Cancer Screening | How is Oral Cancer Detected?
Cavities, also known as dental caries, are areas of decay on teeth that can lead to serious dental issues if patients do not have them addressed. They often result from the demineralization of tooth enamel due to acids produced by bacteria in the mouth. Understanding what cavities look like and how they develop is crucial for maintaining good dental health.
ProDENT is dedicated to improving dental diagnosis and care. We ensure that patients and dentists can recognize and address cavities early.
Key Takeaways
- Cavities are areas of tooth decay that can appear as dark spots or white patches on teeth.
- Regular dental check-ups are essential for early detection and treatment of cavities.
- Intraoral cameras enhance cavity detection by providing detailed images of tooth surfaces.
- Signs of a cavity include tooth sensitivity and visible discoloration on teeth.
- Preventing cavities requires good oral hygiene practices and routine dental care.
What is a Cavity?
A cavity is a damaged area on a tooth caused by decay. Cavities on teeth occur when acids produced by bacteria erode the tooth enamel. This process can lead to holes or openings in the teeth, known as cavities. If left untreated, cavities can progress deeper into the tooth structure, potentially causing severe decay and even tooth loss. Understanding what a cavity looks like is important for early detection and intervention.
What does a Cavity Look Like?
Cavities can vary in appearance depending on their stage of development:
| Stage of Cavity |
Appearance |
| Early Cavity |
White spots or chalky areas on the enamel |
| Moderate Cavity |
Brown or black spots, indicating more extensive decay |
| Advanced Cavity |
Larger holes or pits visible on the tooth surface |
Recognizing these signs of decay early can help in preventing further damage to the tooth.
Side Cavity Tooth
A cavity on the side of a tooth occurs between adjacent teeth or along the gum line. These cavities may not be immediately visible but can be detected through regular dental check-ups or X-rays. They often appear as dark shadows on dental X-rays and may cause discomfort if they progress. Early detection is critical to prevent further decay and maintain healthy teeth.
Front Cavity Tooth
Cavities on the front teeth are noticeable due to their location. These cavities may manifest as white spots initially and progress to brown or black discoloration as decay worsens. The visibility of front cavities often prompts individuals to seek dental care sooner, which makes early detection more likely. Maintaining good oral hygiene practices can help prevent cavities from forming in these prominent areas.
Cavity Between the Teeth
Cavities that form between teeth are common and can be difficult to spot without professional help. These cavities may not cause immediate symptoms but can lead to significant problems if they progress. They often appear as dark areas on dental X-rays and may require dental fillings or crowns for treatment. Regular dental check-ups are essential for spotting these hidden cavities before they become advanced.
How to Tell If You Have a Cavity
Signs of a cavity may include:
- Tooth sensitivity when consuming hot or cold foods
- Visible holes or pits in the affected teeth
- Discoloration, such as brown or black spots
- Pain when biting down or chewing
If you experience any of these symptoms, it’s important to schedule a dental visit for an evaluation. Early detection of cavities is essential for effective treatment and preventing further decay.
How to Get Rid of Cavities
The primary method for treating cavities involves removing the decayed portion of the tooth and filling it with a dental material, such as composite resin or amalgam. This procedure helps restore the tooth's function and prevents further decay. In more severe cases where decay has reached deeper into the tooth structure, root canals, dental implants, or crowns may be necessary.
Dental Fillings Process:
-
Diagnosis: Dentist identifies the cavity using visual examination and X-rays
-
Anesthesia: Local anesthesia is administered to numb the area
-
Decay Removal: The dentist removes decayed tissue using a dental instrument
-
Filling Placement: The cavity is filled with an appropriate material
-
Polishing: The filling is polished to ensure smoothness
How to Prevent Cavities
Preventing cavities involves maintaining good oral hygiene and regular dental care:
- Brush your teeth twice daily with fluoride toothpaste
- Floss daily to remove food particles between teeth
- Limit sugary snacks and drinks that contribute to acid production
- Use dental sealants to protect vulnerable areas of your teeth
- Schedule regular dental check-ups for professional cleanings and assessments
ProDENT: Improve Dental Diagnosis Today
Understanding what cavities look like is vital for maintaining good dental health. Regular dental check-ups are essential for early detection and treatment of cavities, allowing you to address any issues before they worsen. At ProDENT, we focus on improving dental diagnosis through innovative tools like intraoral cameras and dental sensors that improve cavity detection accuracy.
Get in touch to improve your clinic's dental diagnoses!
FAQs on Dental Caries Detection | What Do Cavities Look Like?
What does a cavity look like on a scan?
On a dental X-ray scan, a cavity often looks like a dark area within the lighter shade of the tooth structure, indicating dental decay. Regular dental checkups at your preferred dental clinic can help detect cavities early, preventing them from progressing to large cavities that may require extensive treatment.
What does a stage 1 cavity look like?
A stage 1 cavity typically looks like a small white or brown spot on the enamel, indicating the initial signs of tooth decay. Maintaining a healthy smile involves addressing cavity formation early before it progresses to deeper layers of the tooth. As your cavity progresses, it can cause serious harm and potentially permanent consequences.
What does a stage 2 cavity look like?
A stage 2 cavity tends to look a lot more like a pronounced dark spot or hole on the surfaces of your teeth as the decay progresses into the dentin layer. If untreated, cavities can cause further damage, potentially requiring treatments like dental crowns or even leading to painful dental emergencies.
Back to Top: Dental Caries Detection | What Do Cavities Look Like?
The best dental X-ray sensor for your practice is one that combines high-resolution imaging with durability and comfort. Digital dental X-ray sensors have improved dental imaging, providing clearer images and faster processing times compared to traditional film. We will compare the ProDENT Digital Dental X-Ray Sensor with leading competitors, highlighting its value for money and usefulness in a dental practice.
| Feature |
ProDENT |
Carestream® |
Schick® |
DentiMax Dream |
Open Sensor |
| Price |
Competitive |
$5,999 |
$7,995 |
$6,999 |
$2,999 |
| Thickness |
4.4 mm |
7.3 mm |
7.0 mm |
5.3 mm |
5.0 mm |
| Manufacturer Warranty |
3 Years |
3 Years |
1 Year |
3 Years |
3 Years |
| Replacement Sensors |
Brand New |
Brand New |
May Be Refurbished |
Brand New |
Brand New |
Key Takeaways
- ProDENT offers a high-resolution imaging solution at a competitive price.
- Carestream® provides advanced features but at a higher cost.
- Schick® sensors are known for their reliability but lack some modern features.
- DentiMax Dream Sensor is popular for its image quality and support options.
- Open Sensor is budget-friendly but may compromise on durability.
1. ProDENT Digital Dental X-Ray Sensor
The ProDENT Digital Dental X-Ray Sensor stands out as one of the best dental X-ray sensors available today. It delivers 25 lp/mm high-resolution imaging and creates crystal-clear X-rays that improve diagnostic accuracy. At just 4.4 mm thick, it is designed for patient comfort. Our dental X-ray sensor makes it easier to position it in the patient’s mouth without causing discomfort.
Key Features
-
Durable Construction: The ProDENT sensor is tested for over 80,000 bends and has an IP68 rating. Our X-ray sensor is dust-tight and can withstand immersion in water.
-
Size Options: Available in two sizes—P1 for children and smaller adults and P2 for adult bitewings—they allow flexibility in various clinical scenarios.
-
Compatibility: Works seamlessly with popular imaging software like Dexis, Eaglesoft, and Romexis and facilitates easy integration into existing workflows.
ProDENT ensures accurate imaging while improving patient comfort and providing seamless software integration, making it an excellent choice for any dental office.
2. Carestream®
Carestream Dental offers a range of digital X-ray sensors known for their high-quality images and advanced features. The RVG 6200 model is particularly noted for its resolution of 24 lp/mm, providing excellent image quality that aids in diagnosing dental issues effectively.
Key Features
-
Price: The Carestream RVG 6200 retails at approximately $5,999, making it a mid-range option.
-
Thickness: At 7.3 mm, it is thicker than the ProDENT sensor but still manageable for most patients.
-
Warranty: Comes with a 3-year manufacturer warranty and offers a 5-year Advantage Plan for added protection against defects.
While Carestream sensors provide high-resolution images, their higher price point may not be justified for all practices compared to ProDENT’s value proposition.
3. Schick®
Schick® sensors are recognized in the dental community for their reliability and consistent performance. The Schick sensor range includes models that provide good image quality, however, they lack some of the latest technological advancements seen in newer products.
Key Features
-
Price: Retailing at around $7,995, Schick sensors are on the pricier side.
-
Thickness: At 7.0 mm, they are thicker than ProDENT. This thickness may affect patient comfort during use.
-
Warranty: Includes a 3-year manufacturer warranty, providing assurance of quality.
While Schick sensors are dependable, they don't offer the same level of comfort or image quality as ProDENT, making them less appealing to practices focused on patient care.
4. DentiMax Dream Sensor
The DentiMax Dream Sensor is another strong competitor in the digital X-ray sensor market. It has received positive reviews for its image clarity and ease of use.
Key Features
-
Price: Priced at approximately $6,999, it competes closely with ProDENT.
-
Thickness: With a thickness of 5.3 mm, it strikes a balance between comfort and durability.
-
Active Imaging Area: Offers an active imaging area of 900 mm², providing ample coverage during imaging procedures.
The DentiMax Dream Sensor also includes a comprehensive support plan post-purchase, which can help practices looking for ongoing assistance. However, when compared to ProDENT's features and pricing, some practices may find better value elsewhere.
5. Open Sensor
The Open Sensor is an entry-level option in the digital X-ray sensor market. While it offers affordability, there are trade-offs regarding durability and image quality.
Key Features
-
Price: Retailing at about $2,999, it is one of the most budget-friendly options available.
-
Thickness: At just 5.0 mm, it is relatively slim, but other models are more robust.
-
Warranty: Comes with a standard 3-year manufacturer warranty, similar to many competitors.
While the Open Sensor can be appealing due to its low price point, practices should consider whether the potential compromises in image quality and durability align with their needs for effective patient care.
ProDENT: Efficient Digital Dental X-Ray Sensor
When selecting a digital dental X-ray sensor, it's essential to consider factors such as image quality, price, durability, and warranty options. The ProDENT Digital Dental X-Ray Sensor excels in these areas by offering high-resolution imaging at an affordable price while ensuring patient comfort and compatibility with popular imaging software.
If you’re in the market for a reliable digital X-ray sensor that provides excellent value for money, contact ProDENT today to enhance your practice's diagnostic capabilities.
FAQs on Best Dental X-Ray Sensor | Dental Sensor Comparison
How do I choose a dental sensor?
Choosing a dental sensor requires evaluating sensor size, compatibility with practice management software, and the quality of diagnostics provided. A dental X-ray sensor comparison can help identify whether digital dental sensors like the ProDENT Digital Dental X-Ray Sensor, RVG 6100 digital, or Gendex are the right fit for a dental practice's digital imaging system.
How long do dental X-ray sensors last?
Dental intraoral X-ray sensors typically last 5-7 years, depending on usage, maintenance, and build quality. High-quality digital radiography sensors, such as those from Aceton or other trusted dental product vendors, are designed for durability and reliable performance.
Why are dental sensors so expensive?
Dental sensors are costly due to advanced technology, precision manufacturing, and their integration into a digital imaging system for accurate diagnostics. These sensors deliver high-resolution images and seamless connectivity with dental practice management software, justifying the sensor cost for modern dental practices investing in new dental products.
Back to Top:Best Dental X-Ray Sensor | Dental Sensor Comparison
When choosing between wired and wireless options for intraoral cameras, wired systems generally provide better reliability and performance. This article will explore the benefits and drawbacks of both wired and wireless intraoral cameras. ProDENT offers solutions that prioritize stability and functionality, making wired intraoral cameras the best choice.
Key Takeaways
- Wired intraoral cameras offer superior reliability and faster data transfer.
- Wireless intraoral cameras can suffer from connectivity issues and interference.
- Choosing a wired intraoral scanner ensures compliance with HIPAA regulations.
- ProDENT specializes in wired solutions that integrate seamlessly with dental software.
- A wired connection for a camera for teeth provides a more stable environment for dental technology.
Wired Intraoral Cameras
Wired intraoral cameras are designed with a direct connection to a computer or workstation, typically using USB or Ethernet cables. This setup creates a stable and fast data transfer rate and is essential for high-quality imaging in dentistry.
Benefits
-
Reliability: Wired connections are less prone to interference compared to wireless networks. Reliability is crucial when capturing detailed images of patients’ mouths.
-
Speed: Wired intraoral cameras transmit data faster than wireless mouth cameras. Higher speed improves workflow efficiency in the dental office.
-
Compliance: A wired connection helps ensure compliance with HIPAA regulations. This is because data is less susceptible to unauthorized access.
-
Integration: Wired systems can easily integrate with existing dental software and practice management tools, such as Dexis 9. This streamlines operations.
-
Less Maintenance: Wired systems have fewer components that can fail and generally require less maintenance than wireless systems.
Disadvantages
-
Limited Mobility: The need for cables can restrict movement within the treatment area. This issue can potentially affect workflow.
-
Installation Complexity: Setting up a wired system can require more planning and installation time than wireless options.
-
Cable Management: Managing cords can create clutter in the dental office if not organized properly.
Wireless Intraoral Cameras
Wireless intraoral cameras operate via a wireless network, allowing for more mobility within the dental practice. However, they come with several challenges that can affect their performance.
Benefits
-
Mobility: Wireless intraoral cameras help dental professionals move freely without being tethered to a workstation. This improves patient interaction.
-
Reduced Clutter: Eliminating cables creates a cleaner workspace and improves the aesthetic of the dental office.
Disadvantages
-
Connectivity Issues: Wireless connections can be impacted by interference from other devices or physical obstructions. This causes dropped signals or poor image quality.
-
Data Transfer Speed: Wireless technology generally has slower data transfer rates than wired connections. This issue can hinder workflow efficiency.
-
Security Risks: Wireless networks are more vulnerable to unauthorized access. This raises concerns about patient data security and compliance with regulations like HIPAA.
Why should I choose a wired intraoral scanner?
| Feature |
Wired Intraoral Cameras |
Wireless Intraoral Cameras |
| Reliability |
High |
Moderate |
| Data Transfer Speed |
Much Faster |
Slower |
| Compliance |
Easier (HIPAA compliant) |
More challenging |
| Mobility |
Limited |
High |
| Maintenance |
Less Frequent |
More Frequent |
You should choose a wired intraoral scanner for its reliability, speed, simple integration, and reduced risk of technical issues.
The most significant benefit is reliability; wired systems provide stable connections that ensure high-quality imaging without interruptions. The speed of data transfer with a wired connection creates immediate access to images and patient information, which is essential in busy dental practices.
Using a wired system simplifies integration with existing dental technology, such as X-ray machines and practice management software. This compatibility reduces the risk of technical issues that could disrupt patient care. Given these factors, dentists looking for optimal performance should strongly consider selecting a wired intraoral camera.
The Role of Intraoral Cameras in Patient Communication
Intraoral cameras help improve communication between dental professionals and patients. By providing real-time visual feedback during examinations, these cameras help bridge the gap between complex dental concepts and patient understanding. Additionally, intraoral cameras, either wired or wireless, help patients in these ways:
-
Visual Evidence for Better Understanding: Improves clarity by providing images that help patients understand and make informed decisions
-
Building Trust and Rapport: Creates an open dialogue that encourages discussions and involves patients in their oral health decisions
and empowers patients
-
Improving Treatment Acceptance: Highlights the urgency of the situation, and the benefits of the surgery, and prompts immediate action.
Together, these benefits highlight the importance of having a secure wired intraoral camera—one your patients can rely on, too.
ProDENT: Intraoral Camera Wireless Solutions
ProDENT are experienced in providing high-quality wired intraoral cameras designed for modern dental practices. Our products ensure seamless integration with your existing systems and prioritize reliability and speed. By choosing ProDENT’s wired solutions, you can make an informed decision that enhances your practice’s efficiency and patient care.
Contact us today to learn more about our offerings and how they can benefit your dental office.
FAQs on Wireless or Wired | Picking the Right One for Your Dental Practice
What is the difference between Dexis 3700 and 3800?
The Dexis 3700 and 3800 differ in their technical specifications and features. While both are designed for oral imaging, the Dexis 3800 offers improved resolution and integration with advanced PC software for superior diagnostics. For clinics using a wired network, the Dexis 3800 ensures more stable performance compared to its predecessor, making it a better choice for dental practices focused on reliability.
Which dental instrument delivery system works best if using 4-handed dentistry?
A centralized rear delivery system is the best choice for dental practices using four-handed dentistry. This configuration allows seamless access to tools such as a wired intraoral camera, printer, and other essential instruments while maintaining ergonomic efficiency. It also integrates well with a wired scanner and a reliable power supply, ensuring uninterrupted workflow during procedures.
Which concept of four-handed dentistry is most beneficial?
Ergonomic positioning is the most beneficial concept in four-handed dentistry, especially when paired with advanced technology. Using a wired network to connect devices like an intraoral camera or a server ensures consistent performance and reduces disruptions. When choosing the right intraoral camera or other equipment, ensuring compatibility with the dental setup and vendor specs is critical for efficiency and patient comfort.
Back to Top: Wireless or Wired | Picking the Right One for Your Dental Practice
Dental claim submission can be tedious and requires precision to ensure every claim is done correctly. It’s especially important to teach new staff members how to run through this process properly, so operations don’t get interrupted, and costly errors are avoided.
Our experts at ProDENT have put together this guide to dental insurance claims processing to help streamline the process. Dental billing is easy when the process is clear!
Key Takeaways
- Dental insurance claims involve submitting accurate treatment details, verifying patient coverage, and coordinating benefits when multiple policies are in play, ensuring proper payment and minimal patient expenses.
- Precise patient details, correct CDT codes, and supporting materials like X-rays or treatment notes are essential for smooth claim processing and avoiding delays or denials.
- Common issues like coding mistakes, incomplete forms, or policy limitations can lead to claim denials. Addressing these promptly and using appeals processes with strong supporting documentation can help resolve disputes.
- Practices benefit from dental claims processing support and advanced tools like ProDENT intraoral cameras, which enhance patient communication and streamline documentation for claims.
What is Dental Insurance Claims Processing?
Dental insurance claims processing is the way dental offices and insurance companies handle payment for dental services for patients on an insurance plan. When a patient visits the dentist, the dental office collects all the necessary information and sends a claim to the insurance company. The insurance company then checks the claim to decide how much they’ll cover based on the patient’s benefits and policy limits.
Sometimes, dental offices need dental claim support to help fix common issues like missing information or coding mistakes. If a claim is denied, this support can help get it corrected and approved. Many dental offices work with dental claims processing companies to make the process faster and simpler.
How to Submit a Dental Insurance Claim: A Comprehensive Guide

In most cases, dental professionals submit dental insurance claims on behalf of their patients. A dental claim form is rarely submitted by the individual who received dental care. Here’s the process:
1. Insurance Coverage Verification
Before treatment, confirm the patient’s eligibility and plan details to see what’s covered and what the patient will pay. Check for any waiting periods, coverage limitations, annual maximums, and deductibles on their dental plan. Be aware of deadlines, like the American Dental Association (ADA) or AARP timely filing rules, which indicate the time limit for submitting claims.
2. Get Prior Authorization
Prior authorization is a process where the dental clinic seeks approval from the insurance company before performing certain procedures. This step helps confirm that the planned treatment is covered under the patient’s insurance policy, reducing the risk of unexpected costs.
To obtain prior authorization, the dentist submits details about the proposed treatment, including procedure codes, estimated costs, and any necessary supporting documents like X-rays or notes explaining the need for the procedure.
It’s important to understand that prior authorization is not a guarantee of payment. Even if a treatment plan is pre-authorized, claims can still be denied for various reasons. For example, the patient might lose eligibility before the procedure, the maximum benefit for that service might have already been reached, or specific time limits may prevent coverage.
3. Record Treatment Details
Complete and accurate documentation — including patient details, treatment notes, correct dental codes, and any necessary attachments, like X-rays — helps to make sure the claim goes smoothly.
Here’s what should be included:
-
Patient Information: Basic details like the patient’s name, date of birth, and insurance ID are necessary to verify identity and coverage.
-
Treatment Notes: Detailed notes describing what was done during the appointment. These notes should cover specifics, like which teeth were treated, and the surfaces involved (e.g., top, bottom, left side). This level of detail can prevent questions from the insurance company which may lead to delays.
-
Procedure Codes (CDT Codes): Each dental procedure has a specific code, known as a Current Dental Terminology (CDT) code. Codes inform the insurer about what specific services were performed. Using the correct code is important for the claim to be accurately processed and reimbursed.
-
Additional Information: Sometimes, the insurance provider may need extra proof to approve a claim. This could include X-rays, intraoral images, or periodontal charts if they help justify the treatment. Providing these attachments upfront can avoid unnecessary back-and-forth.
4. Submit the Claim
-
Verify All Information: Before submitting, review the claim details carefully. Even minor errors in patient, provider, or procedure information can cause delays or denials.
-
Submit an Electronic Claim: Once verified, the dentist submits the claim through the dental practice management software, which connects directly with insurer systems.
-
Monitor Claim Status: Dentists can track the claim’s progress using real-time tools in the software or through the insurer’s portal. This allows them to quickly address any issues, such as requests for additional documentation.
5. Navigate Coordination of Benefits (COB)
Coordination of Benefits (COB) applies when a patient has multiple dental insurance plans. The primary plan pays first, followed by the secondary plan, which may cover the remaining eligible costs.
Generally, the plan covering the patient as an employee is primary, while dependent/child coverage often follows the “birthday rule,” using the plan of the parent with the earliest birthday in the year.
To navigate COB, determine which plan is primary, submit the claim to that insurer first, then to the secondary with the Explanation of Benefits (EOB) from the primary claim attached. Tracking both claims helps ensure proper payment and minimizes out-of-pocket expenses.
6. Claims Adjudication Process
Once the claim arrives at the insurance company, they go through their own process to verify it. This is slightly different for each company, but generally looks like this:
| Step |
Process Details |
| Initial Review |
- Verification that all required information is present and accurate.
- Checking patient details, procedure codes, and supporting documentation.
- Incomplete or incorrect claims may be rejected at this stage.
|
| Automated Processing |
- Automated systems apply predefined rules to evaluate the claim’s validity, coverage, and compliance with policy terms.
- Claims that meet all criteria may be approved automatically.
- Others may require further review.
|
| Manual Review |
- Claims flagged during automated processing undergo manual review.
- Examiners assess medical necessity, appropriateness of treatment, and adherence to policy guidelines.
- Supporting documents are evaluated to substantiate the claim.
|
| Payment Determination |
- The insurer decides on the payment amount based on the patient’s coverage, policy limits, and any deductibles or co-payments.
- They issue an EOB to the patient and the dental provider, detailing the payment decision and any patient responsibility.
|
| Claim Resolution |
- If the claim is approved, payment is made to the dental provider or reimbursed to the patient, depending on the arrangement.
- If denied, the EOB will explain the reasons, and the provider or patient may appeal the decision by providing additional information or clarification.
|
7. Payment Reconciliation
Payment reconciliation involves comparing insurance payments received with the amounts billed to spot any discrepancies.
Steps for Payment Reconciliation
-
Record Payments: Enter payments into the accounting system as they arrive, to keep records up to date.
-
Review the Explanation of Benefits: Match EOB details with billed services to confirm accuracy.
-
Identify and Resolve Discrepancies: Address any underpayments, overpayments, or denials by contacting the insurer and providing additional information if needed.
-
Update Patient Accounts: Adjust patient accounts to reflect accurate balances and notify patients of any changes.
Managing Denied or Rejected Claims
If a claim is denied or rejected, review the EOB to understand the reason. Common causes include coding errors, inaccurate documentation, or policy limitations. Correct any issues and resubmit with the necessary support.
If the denial continues, consider filing an appeal with extra documentation. Keeping clear communication with the insurer throughout this process can make it go much faster and help you spot issues before they arise. Many insurance companies have dental claim support to help you through.
What are Common Causes for Claim Denials?
In many cases, dental insurance coverage isn’t able to be paid out because of a minor error. If your claim is denied, check these first. Being aware of these beforehand can prevent claim denials.
Coding Errors
Claims may be denied due to incorrect or outdated procedure codes. This often happens when the codes used don’t match the treatment provided or if the coding system guidelines have changed. Staying updated on the latest coding standards and conducting regular staff training on coded procedures can reduce these types of denials.
Inaccurate Documentation
Denials often occur when claim forms are missing important details, like patient information, treatment specifics, or signatures. Even small omissions can lead to rejections. Having a thorough documentation review process before submission helps to catch these mistakes.
Policy Coverage Limitations
Some dental procedures may not be covered due to the patient’s specific plan limitations, exclusions, waiting periods, or frequency restrictions. Insurance verification before treatment is important to prevent claims from being denied after services are rendered. Patients should be informed of their coverage limits in advance to avoid misunderstandings.
How to Appeal a Denied Claim: Step-by-Step Guide

-
Understand the Denial Reason: Review the EOB to identify why the claim was denied.
-
Gather Supporting Documentation: Collect treatment notes, X-rays, and correspondence with the insurer. Make sure that all information is accurate and complete.
-
Contact the Insurance Company: Draft a clear and concise letter explaining why the claim should be reconsidered. Include patient information, claim details, and a summary of supporting evidence. Be polite and professional.
-
Submit the Appeal: Send the appeal letter and supporting documents to the insurance company’s appeals department. Follow the insurer’s guidelines for submission, which may include specific forms or electronic submission methods.
-
Follow-Up: After submission, monitor the status of the appeal. Keep records of all communications and be prepared to provide additional information if requested.
For Dental Professionals: ProDENT’s Innovative Imaging Solutions
Experience unparalleled precision and clarity with ProDENT’s high-performance intraoral cameras. Engineered for sharp, high-definition imaging and effortless compatibility with dental software, these devices set a new standard in dental care. Designed with ease of use and patient comfort in mind, they enable accurate diagnoses while providing patients with clear, real-time insights into their oral health.
ProDENT seamlessly blends advanced technology with affordability, delivering solutions that elevate the quality of care in your practice. Discover our range of innovative tools today and enhance every aspect of your dental services. Visit ProDENT’s store and equip your practice with game-changing technology!
Dental Insurance Claims Processing FAQs
How long does it take for dental insurance to reimburse a successful claim?
Dental insurance claims are usually paid out within 15 to 60 days. Simpler claims are often completed in just a few weeks, but more complex claims may take longer. Processing times also vary by insurance provider and can be regulated by state laws, which may set specific deadlines for insurance reimbursement.
Can I file my own dental insurance claims?
Yes, you can file your own dental insurance claims, especially if you visit an out-of-network provider. To do this, fill out the insurance claim form provided by your insurer, attach itemized receipts and any required documentation from your dentist, and submit it as directed. Follow up with the insurer to track the claim’s status and address any potential issues.
Back to Top: The Ultimate Guide to Dental Insurance Claims Processing
Most of the best dental intraoral cameras are designed to work with external screens. So if you’re looking for one that comes with a screen, you might struggle to find one that produces excellent quality images.
As experienced dental camera users, our ProDENT experts recommend choosing a top-quality intraoral camera system that can plug easily into your existing computer screen and integrate with your dental software. Here’s everything you need to know about making the right choice for your dental practice’s camera needs.
Key Takeaways
- Cameras with built-in screens are convenient for small practices but lack the image quality and flexibility of computer-connected models.
- Computer-connected cameras offer superior resolution, larger displays, and seamless software compatibility, ideal for modern practices.
- Look for high resolution, LED lighting, ergonomic controls, and easy connectivity (USB or wireless) to ensure clarity and workflow efficiency.
- The PD720 offers top-tier HD imaging, while the budget-friendly PD740 delivers excellent value, both enhancing patient care and diagnosis.
What is an Intraoral Camera?

An intraoral camera is a small, handheld device used by dentists to capture high-quality images of the inside of a patient’s mouth. These crystal-clear images can be used for various purposes, including:
-
Patient Education: Dentists can use intraoral cameras to show patients the condition of their teeth and gums, helping them understand the need for treatment.
-
Diagnosis: Intraoral cameras can help dentists identify and diagnose oral health problems, such as cavities, gum disease, and oral cancer.
-
Treatment Planning: Dentists can use intraoral images to plan and communicate treatment plans with patients.
-
Documentation: Intraoral images can be used to document the patient's oral health over time and track progress.
Intraoral Camera with Screen vs. No Screen
Finding a dental intraoral camera with a screen can be tricky. But do you really need one with a built-in monitor? Let’s compare.
Intraoral Cameras with a Separate Screen
Some intraoral cameras come with a small, portable monitor that can be positioned close to the patient. This separate screen allows for easy viewing during exams without needing a full computer setup.
This setup is convenient for showing patients high-resolution images in real time, which can help with understanding their oral health. The floating monitor adds flexibility for smaller practices and for those looking to maximize chair-side convenience without a full computer.
Intraoral Cameras without a Screen (Computer Connection)
Other intraoral cameras are designed to connect directly to a computer, either by hassle-free USB connection or with wireless functionality. This type allows images to be displayed on larger monitors, offering better detail and higher resolution for more accurate diagnosis and patient education.
While it requires a computer setup, it’s ideal for practices that prioritize detailed image analysis and storage options.
Pros of an Intraoral Camera with Screen

Convenience
Intraoral cameras paired with a dedicated monitor offer immediate image display without the need for a computer setup. This streamlined approach simplifies the examination process, allowing dentists to focus on patient care without technical distractions.
May Save You Money
For new practices without existing computer equipment, choosing an intraoral camera with its own screen can reduce initial expenses. This option eliminates the need to invest in additional computer hardware, making it a budget-friendly choice for those starting out.
For practices with limited space, an intraoral camera with its own screen can be a compact solution. It reduces the need for bulky computer stations, helping to maintain a clutter-free and organized workspace.
Easy to Show the Patient
Having a monitor chair side allows dentists to show patients real-time images of their oral health. This visual aid helps patients understand the diagnosis and makes them more likely to accept treatment plans, building trust between the patient and the dental professional.
User-Friendly Operation
Intraoral cameras are designed with simplicity in mind, featuring intuitive controls that require minimal training. This ease of use can lead to more efficient patient examinations and a smoother workflow for dental staff.
Cons of an Intraoral Camera with Screen
Doesn’t Improve Image Quality
Intraoral cameras with their own screens don’t offer better image quality or resolution compared to those that connect to existing computer systems. The built-in screens are often smaller and may not display images as clearly as larger computer monitors.
Might Be Unnecessarily Costly
Purchasing an intraoral camera with a separate screen can be more expensive. If your practice already has computer monitors, there’s no need to invest in a camera with its own screen. It could lead to unnecessary expenses.
Less Stable Than a Laptop
Standalone screens may lack the stability and durability of computer setups. They can be more prone to damage or malfunction, which might disrupt the workflow in a dental practice.
May Not Work with Other Screens
Intraoral cameras with dedicated screens may not connect easily to other monitors or computer systems. This limitation can reduce flexibility, especially if the built-in screen encounters issues or if there's a need to display images on a larger monitor for better visibility.
The Intraoral Cameras We Recommend
Based on our experts’ comparison, it’s easy to see that a dental intraoral camera with a screen isn’t a necessity. Plus, they’re a bit less common than those without screens, so it’s hard to find an excellent quality one.
If you’ve got the budget for it, we highly recommend the ProDENT HD Intraoral Camera PD720. For those on a tighter budget, the ProDENT Dental Intraoral Camera PD740 is an excellent option that packs a lot of value into a great price.
| Feature |
ProDENT HD Intraoral Camera PD720 |
ProDENT Dental Intraoral Camera PD740 |
| Works on All Laptops |
✅ Windows 7 and upwards |
✅ Compatible with Windows 7, 8, and 10 |
| Compatible with Various Dental Software |
✅ Easy integration with dental software like Apteryx, Eaglesoft, Dexis, and more |
✅ Integrates seamlessly with over 50 imaging suites |
| Excellent Quality Images |
✅ Crystal-clear HD images with 1 to 4x zoom |
✅ Up to 3.8 million pixels picture quality |
| Easy to Use |
✅ Plug and play, no drivers needed |
✅ Easy plug-and-play via USB |
| Price |
✅ $469 |
✅ $199 |
Still Want a Dental Intraoral Camera with a Screen?
If you’ve got your heart set on buying a dental intraoral camera with a screen attached, here’s what to consider when shopping.
| Feature |
Description |
| Screen Size |
- At least 17 inches in size
- Provides clear and detailed images for accurate diagnosis and patient communication
|
| Viewing Angle |
- Wide viewing angle
- Helps both the dentist and patient view images from various angles for a comprehensive look
|
| External Monitors |
- Supports external monitors or larger displays
- Adds flexibility for presentations or detailed examinations
|
| Resolution |
- High resolution (10 megapixels or more)
- Detailed images support better diagnosis and treatment planning
|
| Focus Types |
- Autofocus or adjustable focus
- Captures clear images at various distances for different examination needs
|
| LED Lighting |
- Built-in LED lighting
- Consistent illumination enhances image clarity and minimizes shadows
|
| Connectivity |
- USB connection for easy image transfer to computers
- Wireless cameras allow mobility and reduce cable clutter
|
| Software Integration |
- Compatibility with dental imaging software
- Ensures smooth integration into your practice's systems
|
| Portability |
- Compact and lightweight
- Easier to handle and transport
|
| Button Placement |
- Ergonomic button placement
- Allows quick image capture without disrupting the examination process
|
Enhance Your Dental Practice with ProDENT’s Next-Gen Imaging Solutions
Discover the power of precision and clarity with ProDENT’s advanced intraoral cameras. Designed to deliver sharp, high-definition visuals and seamless integration with dental software, these tools redefine dental imaging. With intuitive operation and a focus on patient comfort, ProDENT cameras empower practitioners to make accurate diagnoses while giving patients an instant, clear understanding of their oral health.
ProDENT combines innovation with accessibility, offering solutions that enhance patient care without compromising simplicity or affordability. Explore our collection today and take your dental services to new heights. Visit ProDENT’s store to equip your practice with tools that make a difference!
FAQs on Looking for Dental Intraoral Camera with Screen?
How is the camera sterilized between patients?
Intraoral cameras come into contact with patients’ saliva and blood, which makes proper cleaning between uses essential to prevent cross-contamination. Since these devices contain sensitive electronics, they can’t undergo heat-based sterilization methods like autoclaving. Instead, the recommended procedure involves:
-
Use Disposable Sheaths: Place a new, single-use protective cover over the camera for each patient. Most intraoral cameras come with sleeves and accessories to keep them clean.
-
Surface Cleaning: After removing the sheath, wipe the camera’s exterior with an appropriate disinfectant wipe, avoiding excessive moisture to protect electronic components.
-
Lens Care: If the lens requires cleaning, gently wipe it with an alcohol wipe, following the manufacturer’s guidelines to prevent damage.
What is the resolution of an intraoral camera?
Modern intraoral cameras typically offer high-definition (HD) resolutions. Some models provide true 1080p HD quality, capturing over 2 million pixels. However, others can capture images of 480p to 720p HD quality, which is still good enough for dentistry patient records. The resolution of intraoral cameras varies across models.
Can intraoral cameras capture video?
Yes, many intraoral cameras are equipped to capture both still images and live video. This functionality allows dental professionals to record real-time footage of the oral cavity, which can be valuable for patient education, documentation, and case presentations. When choosing an intraoral dental camera, consider models that offer high-quality video capture to enhance patient communication and improve diagnostic accuracy.
Back to Top: Looking for a Dental Intraoral Camera with a Screen
Dental photography in 2024 continues to evolve, with new advancements in camera technology, lighting techniques, and positioning strategies. High-quality dental images are a must for clinical documentation, treatment planning, patient education, and effective communication with labs.
Our professionals at ProDENT have created this comprehensive guide for achieving consistent and high-quality dental photographs. Bookmark it so you can learn advanced positioning techniques, equipment recommendations, and practical tips to improve your dental photographs!
Key Takeaways
- Intraoral images focus on detailed shots inside the mouth, while extraoral photos capture broader views of the face and jaw for orthodontic and cosmetic assessments.
- High-quality cameras, macro lenses, and accessories like cheek retractors, mirrors, and ring flashes are necessary for clear, detailed images.
- Proper patient and camera positioning, consistent setups, and correct lighting prevent distortion, while post-processing ensures clarity and accurate color representation.
- Dental photography aids in documentation, legal purposes, and monitoring oral health. It is essential for diagnosis, treatment planning, and patient communication.
Importance of Dental Photography in Modern Dentistry
Dental photography plays a key role in modern dentistry by improving diagnosis, treatment planning, and patient communication. Clear images help dentists explain oral conditions to patients, document progress, and collaborate with other professionals. These photos also support accurate record-keeping for legal purposes and long-term health monitoring, enhancing both dental care quality and patient understanding.
Types of Dental Photography

Dental photography is divided into two main categories: intraoral and extraoral photographs. Each serves specific purposes in documenting and assessing oral health.
Intraoral
Intraoral photography involves the capture of high-quality images inside the mouth. These close-up photos focus on teeth, gums, and other oral structures, which aid in diagnosing dental issues, planning treatments, and monitoring progress.
Dentists use specialized equipment like macro lenses and ring flashes to obtain detailed images that reveal conditions like cavities, fractures, and gum disease. These photos are valuable for patient education, allowing people to see and understand their oral health status.
Extraoral
Extraoral photography captures images outside the mouth, including the face and jaw. These photos provide a broader view of a patient's dental and facial structure, which is important for orthodontic assessments, cosmetic evaluations, and treatment planning.
Standard extraoral photos include full-face views, profile images, and smiling photos. These images help to analyze facial symmetry, tooth alignment, and the relationship between teeth and facial features.
Best Cameras for Dental Photography
You can choose between a Digital Single-Lens Reflex (DSLR) setup or a dedicated intraoral camera system (some of which may be able to take extraoral dental pictures too). Notably, selecting a high-quality camera is necessary to capture clear, detailed images that can support accurate diagnosis, effective treatment planning, and clear patient communication.
The following digital cameras are our top recommendations for digital photography in a dental practice:
| Camera Model |
Key Features |
Ideal For |
| ProDENT Intraoral Cameras |
High resolution, easy handling, designed specifically for dental use |
Detailed intraoral photography |
| Canon EOS R |
Exceptional low-light performance, shoots in RAW format, versatile mirrorless design |
Intraoral and extraoral images with adaptability |
| Nikon D7500 |
DSLR camera with high resolution, robust features, reliable low-light shooting, RAW format capabilities |
A variety of dental photography needs |
Macro Lenses for Close-Ups
-
Canon EF 100 mm f/2.8L Macro IS USM: A favorite among Canon users, this camera lens offers sharp focus and image stabilization, perfect for capturing precise close-up shots of teeth and oral structures.
-
Nikon AF-S VR Micro-NIKKOR 105 mm f/2.8G IF-ED: This DSLR camera is popular for its high resolution and robust features, including reliable low-light shooting and RAW format capabilities, making it suitable for a variety of dental photography needs.
Basic Camera Settings for Dental Photography
Don’t fall into the trap of setting your camera to “Auto” and leaving it. Taking some time to adjust the settings to those appropriate for clinical photographs will make a big difference to both extraoral and intraoral photos.
| Setting |
Intraoral Recommended Values |
Extraoral Recommended Values |
Purpose |
| Aperture |
f/22 to f/32 |
f/8 to f/16 |
– Intraoral requires deep focus for detailed shots
– Extraoral balances depth of field with broader focus |
| Shutter Speed |
1/200s |
1/125s to 1/160s |
– Higher speed for intraoral to avoid blur
– Lower for extraoral to capture full-face clarity |
| ISO |
100 |
100 to 200 |
– Low ISO for both
– Extraoral may increase slightly to adjust lighting |
| Lens Requirement |
Macro Lens (85 to 105 mm) |
Standard Lens (50 to 85 mm) |
– Macro lens for intraoral close-ups
– Standard for broader extraoral shots |
| File Format |
RAW |
RAW or JPEG |
– RAW offers best quality for both
– JPEG is quicker for extraoral shots |
| Manual or Automatic |
Manual Camera Setting |
Manual Camera Setting |
Allows for more control over your images |
Essential Dental Photography Accessories

Key accessories like cheek retractors, intraoral mirrors, and contrasters enhance clarity, contrast, and accessibility in dental photography. These accessories help professionals capture precise images for diagnosis and for putting a treatment plan together.
Cheek Retractors
Cheek retractors are available in clear plastic or metal and help to pull the cheeks away from the teeth and gums (retract the cheeks) during photography. This provides an unobstructed view inside the mouth, allowing for clearer images. Double-ended retractors offer the flexibility to accommodate various mouth sizes, which makes them useful for different patient needs.
Intraoral Mirrors (Occlusal Mirrors)
Intraoral mirrors are used to capture occlusal (biting surface) and lateral (side) views that may be hard to see directly. Pre-warming or defogging these mirrors prevents fogging during use, which is common due to the warmth and moisture in the mouth. Clear mirrors improve visibility and detail in the images, essential to accurately record a patient’s clinical condition.
Contrasters
Contrasters, typically made of black silicone or metal, are placed inside the mouth to create a dark background behind the teeth. This helps the teeth stand out sharply against the backdrop, making it easier to see fine details, assess shape and color, and enhance the contrast in the images.
Specialized Lighting
Specialized lighting, like ring flashes or LED lights, is extremely important for evenly illuminating the oral cavity. It helps minimize shadows and reflections, which can interfere with the details in the image. Even lighting is especially important in intraoral photography for capturing clear, accurate views of tooth surfaces and gums.
Remote Shutter Release
A remote shutter release allows the photographer to take photos without physically pressing the camera button, reducing the chance of camera shakes. This is highly beneficial for close-up shots or when using slower shutter speeds, as it helps maintain sharpness in the digital image. This is of particular importance when using a point-and-shoot camera or DSLR camera, rather than an intraoral camera.
Gray Cards
Gray cards are used to help set accurate white balance in photos. By including a gray card in a test shot, photographers can calibrate the camera’s color settings to reflect the true colors in the scene. This is important in digital dental photography to capture realistic tooth shades, especially when color matching is needed for procedures like restorative dentistry.
Direct and Indirect Photography Techniques
Direct photography captures images without mirrors, while indirect photography uses mirrors to take dental photos of areas that are hard to see directly. Notably, dental photography requires using both direct and indirect techniques to capture detailed images of a patient’s teeth and gums.
Direct Photography (Headshots and Frontal Retraction)
Direct photography includes full-face headshots and intraoral shots, like frontal retraction views, where images are taken directly without mirrors. This type of portrait photography is key for documenting the overall facial structure and front view of the teeth.
Positioning
For direct shots, such as headshots or frontal views, keep the camera parallel to the patient to avoid distortion. The patient’s head should be parallel to the floor (Frankfort horizontal plane), and the occlusal plane should also be parallel to the tabletop. In other words, the photo should be taken directly in front of the face.
Frontal Retraction
Use cheek retractors to pull back soft tissue, fully exposing the teeth. Position the camera directly in front of the patient at eye level to avoid any upward or downward angles that might distort the image.
Indirect Photography (Using Mirrors for Occlusal and Lateral Views)
Indirect photography uses mirrors to capture hard-to-see areas, such as the biting surfaces (occlusal views) and sides of the mouth (lateral views). This approach helps create a complete view of the mouth’s inner areas.
Mirror Positioning
For occlusal and lateral views, position the camera at a 45-degree angle to the mirror, and hold the mirror at a 45-degree angle to the teeth. This setup prevents distortion and helps capture a clear, accurate image of the dental arches.
Lateral Views
Double-ended retractors are useful for pulling back cheeks, allowing unobstructed views of side teeth. Position the mirror just behind the second molars for a clear view of the lateral teeth.
Practical Tips for Perfect Dental Photography
Achieving high-quality intraoral and extraoral photographs involves paying attention to lighting, preventing image distortion, correct positioning, and maintaining a consistent setup. Each of these areas contributes to capturing clear, detailed images useful for diagnosis and treatment planning.
Get Your Lighting Right
Using the right lighting equipment is key. Ring flashes or twin flashes provide even illumination, which helps reduce shadows and reflections on teeth.
When possible, combine natural light with flash systems to enhance the clarity and color accuracy of images. Avoid using overhead fluorescent lighting, as it can create unwanted glare and distort color.
Avoid Image Distortion
To avoid distortion in direct shots, keep the camera parallel to the patient’s head and teeth. This alignment helps avoid skewed images, maintaining accurate proportions.
For indirect shots using mirrors, positioning is also important. Hold the mirrors at a 45-degree angle to the teeth and align the camera accordingly to capture a true-to-life view of the dental arches without reflections.
Think About Positioning
Proper positioning improves both the comfort of the patient and the ease of capturing quality images. For extraoral shots, seat patients upright with their head in a neutral position.
For intraoral images, reclining the patient at approximately a 45-degree angle is effective. Position yourself at eye level with the patient for headshots or frontal views. For occlusal shots, stand in front of the reclined patient to maintain comfort and efficiency.
Standardize Your Setup
Keeping your setup consistent is important in dental photography. Use the same camera settings for all types of shots to keep image quality uniform.
Prepare your equipment carefully — check that retractors are positioned correctly, mirrors are free of fog, and lighting is stable. Standardizing these details helps you capture clear, professional images every time, which supports accurate documentation and effective communication with patients.
Post-Processing and Editing
Editing dental photos helps make them clearer and more accurate, which is important for documentation and communication with patients.
Basic Editing Techniques
Adjust exposure, contrast, and brightness to highlight details in the teeth and gums. Crop the image to focus on the main area, removing any distracting parts. Use sharpening tools to make features like tooth edges stand out. The goal is to keep the image looking natural while accurately showing the patient’s dental condition.
Ensuring Color Accuracy and Consistency
Accurate color is important in dental photos. Using a gray card during the photo session helps set correct color balance, so colors look true to life.
When editing, make sure your screen is calibrated to keep colors consistent across different devices. Adjusting color balance during editing can correct any color issues, helping the image accurately reflect the real color of the teeth and gums.
ProDENT’s Imaging Solutions
Improve your approach to dental care with ProDENT’s superior intraoral cameras. Engineered for unparalleled precision and comfort, our devices deliver crystal-clear, high-definition images while seamlessly integrating with your dental software. Empower your patients with instant, vivid visuals that make understanding their oral health effortless.
ProDENT combines innovation, affordability, and ease of use to redefine your practice’s standards of care. Explore our advanced imaging solutions today and discover the tools to reimagine your diagnostic capabilities and patient experience. Visit ProDENT now to take your dental services to the next level!
Guide to Dental Photography 2024 FAQs
Can smartphone cameras be used for dental photography?
Yes, smartphones with high-resolution cameras and compatible accessories, like macro lenses and ring lights, can be used for basic dental photography. However, for detailed professional documentation, many dentists still rely on DSLR or mirrorless cameras for superior clarity and control.
Are ring lights or twin flash systems better for dental photos?
Ring lights provide even lighting, ideal for general intraoral images, whereas twin flash systems allow adjustable angles that enhance depth and detail, making them better for capturing textures. Many dental professionals choose based on the specific needs of each shot.
How do I comply with HIPAA in dental photography?
To comply with HIPAA in dental photography, you must obtain written consent from patients, avoid capturing identifiable features, and securely store and share images using encrypted systems. Remove personal identifiers when possible and train staff on privacy practices to maintain compliance.
Back to Top: Guide to Dental Photography 2024
Both DSLR cameras and intraoral cameras can be used to take high-quality dental images. Neither one is specifically better than the other, because your choice largely depends on specific use cases, what kind of photos you want, and your workflow.
Our ProDENT professionals have experience with both of these cameras, so we’ve compiled this handy comparison guide so you can learn more and decide whether a DSLR camera vs. dedicated intraoral camera is right for your needs.
Key Takeaways
- DSLRs offer unmatched image resolution and color accuracy, so they are ideal for comprehensive dental documentation and before-and-after comparisons.
- Compact and easy to use, intraoral cameras allow for quick, real-time image capture, enhancing patient education and speeding up the exam process.
- With interchangeable lenses and manual settings, DSLRs give professionals complete creative control, whereas intraoral cameras focus on efficient, hands-on imaging without the need for extensive setup.
- While DSLRs require a higher initial investment for full setups, intraoral cameras offer a more affordable solution with seamless integration into dental workflows, perfect for everyday use.
What is a DSLR Camera?
A Digital Single-Lens Reflex (DSLR) camera is a digital camera that combines the optics and mechanisms of a single-lens reflex camera with a digital imaging sensor. This design allows photographers to view the exact scene through the lens via an optical viewfinder, which gives them a precise preview of the final image.
Canon and Nikon are the two most popular digital SLR camera brands. Other great brands include Sony, Fujifilm, and Panasonic. These cameras can also be used for purposes outside of dental photography, like taking photos of the staff or premises.
Advantages of DSLR Cameras

-
High Image Quality: DSLRs feature large sensors that capture detailed images with accurate colors, performing well even in low-light conditions.
-
Interchangeable Lenses: You can switch lenses to suit different photography needs, from wide-angle landscapes to close-up portraits.
-
Manual Controls: DSLRs provide extensive manual settings, which allow you to adjust exposure, focus, and other parameters for creative control.
-
Optical Viewfinder: The optical viewfinder offers a clear, real-time view of the scene, helping you to frame and create the ideal images for dental use.
-
Durability: Built with robust materials, DSLRs are designed to withstand various shooting environments, including the dental office.
-
Battery Life: With optical viewfinders that use less power, DSLRs tend to have longer battery life compared to many other camera types.
Drawbacks of DSLR Cameras
-
Size and Weight: The mirror and prism system makes DSLRs bulkier and heavier, which can become tiring during extended use.
-
Complexity for Beginners: The array of features and manual controls may be overwhelming for new users, so there is a learning curve.
-
Mirror Mechanism Noise: The movement of the internal mirror produces noise and vibration, which can be disruptive in quiet settings.
-
Limited Video Autofocus: While DSLRs can record high-quality video, their autofocus during video capture is often slower and less smooth compared to mirrorless cameras.
-
Maintenance Needs: The internal mirror and sensor are susceptible to dust and need regular cleaning to maintain optimal performance.
What is an Intraoral Camera?
An intraoral camera is a small, wand-shaped camera that helps dentists take clear, detailed pictures of the inside of a patient’s mouth. It has a high-resolution camera and a bright light at the tip, making it easy to see teeth, gums, and other oral areas.
Intraoral cameras can zoom in to highlight specific areas, helping detect problems like cavities, cracks, and plaque. The images appear instantly on a monitor, which dentists can review with patients right away. These dental photographs can also be stored for later or shared with specialists when needed.
Advantages of Intraoral Cameras

-
Improves Communication: Real-time images help dentists to visually explain issues and treatments. This leads to better patient understanding and trust.
-
Enhances Diagnostic Precision: High magnification and bright lighting reveal tiny cracks, cavities, and other hard-to-see issues, supporting early and accurate diagnosis.
-
Supports Effective Record-Keeping: Captured images are saved in patient records, creating a visual history that helps dentists track changes and plan treatments over time.
-
Increases Patient Comfort: The small, non-invasive design of intraoral cameras makes exams more comfortable, especially for patients who feel anxious about traditional tools.
-
Saves Time During Appointments: Intraoral cameras allow dentists to quickly capture high-quality images, streamlining the exam process and reducing the amount of time the patient is in the chair.
-
Facilitates Collaboration: Digital images are easy to share with specialists or insurance providers, which makes it simpler to coordinate care and gain treatment approvals.
-
Boosts Treatment Acceptance: When patients see clear images of their dental concerns, they are often more receptive to the recommended treatments.
-
Versatile for Different Procedures: Intraoral cameras can be used across various dental needs, from routine checkups to orthodontic and restorative treatments, making them a versatile tool in dental care.
Drawbacks of Intraoral Cameras
-
Limited Field of View: Due to their small size, intraoral cameras may not capture wide views of the oral cavity, so multiple images may be necessary to cover larger areas.
-
Image Quality Variability: The resolution and color accuracy of intraoral cameras can vary, sometimes resulting in images that are less detailed compared to those taken with DSLR cameras.
-
Maintenance Requirements: Regular cleaning and maintenance are necessary to keep intraoral cameras functioning properly and to prevent cross-contamination between patients.
DSLR Camera vs. Dedicated Intraoral Camera
Which type of camera is right for your needs? Our ProDENT experts compared the features of DSLR cameras and intraoral dental cameras to help you decide.
| Feature |
DSLR Camera |
Intraoral Camera |
| Image Quality |
- High resolution and color accuracy
- Suitable for detailed dental images
|
- Good resolution for dental purposes
- May lack DSLR-level detail
|
| Field of View |
- Wider field of view
- May require changing angles for detailed shots
|
- Focused field of view
- Suitable for specific areas within the mouth
|
| Portability and Size |
- More bulky and may require setup
- Fairly portable from room to room in the dental office
|
- Compact and handheld
- Designed to be easily used within the mouth
|
| Ease of Use and Maintenance |
- Requires some training to operate
- Requires careful cleaning and maintenance due to its components
|
- Often intuitive for dental staff
- Requires regular cleaning to prevent cross-contamination
|
| Cost |
- Typically more expensive upfront
- Added lens options increase costs
|
- More affordable
- Prices vary based on features
|
| Patient Comfort |
- May be intimidating for patients due to its size and presence
|
- Designed for comfort, fits easily within the patient’s mouth
|
| Lens Flexibility |
- Interchangeable lenses allow for different focal lengths and perspectives
|
- Fixed lens specifically for close-up oral imaging
|
| Documentation and Record-Keeping |
- Images can be stored digitally for future reference and detailed records
|
- Images are easy to store and add to patient records
|
| Real-Time Display |
- Requires connection to a monitor or computer to display images
|
- Displays images instantly on a connected monitor for patient viewing
|
Use Cases
DSLR Cameras
Best suited for extraoral imaging, DSLR cameras capture high-quality images with exceptional resolution and depth of field. They are ideal for:
-
Full-Face Shots and Smile Documentation: Perfect for showing overall facial aesthetics, smile transformations, and cosmetic treatments.
-
Before-and-After Comparisons: Helpful for tracking changes over time, particularly in cosmetic dentistry, orthodontics, and restorative treatments.
-
Marketing and Educational Purposes: Due to their high image quality, DSLR photos work well for marketing materials, lectures, and publications.
With interchangeable lenses, especially macro lenses (typically 85 to 105 mm), DSLRs can also capture detailed intraoral photographs, without having to physically be inside the patient’s mouth.
They do require more skill and setup time, making DSLRs more suitable for comprehensive documentation than for quick, day-to-day intraoral imaging.
Intraoral Cameras
Designed specifically for close-up imaging inside the mouth, intraoral cameras are compact, maneuverable, and provide clear views of teeth, gums, and other oral structures. They are best suited for:
-
Diagnosis and Patient Education: Real-time imaging gives patients the chance to see issues like cracked teeth, plaque buildup, or cavities, helping them understand and engage with their oral health.
-
Capturing Hard-to-Reach Areas: The small size and ease of handling make intraoral cameras ideal for detailed images of specific areas within the mouth.
Intraoral cameras are often equipped with macro lenses, allowing for highly detailed intraoral photos without extensive setup. Intraoral cameras are valuable for quick, targeted imaging, particularly when showing patients real-time visuals or capturing precise details for documentation and monitoring purposes.
Setup and Ease of Use
DSLR Cameras
DSLR cameras require a more complex setup, involving interchangeable lenses (such as macro lenses), external flashes (like ring or twin flashes), and manual adjustments to settings like shutter speed, aperture, and ISO. This complexity can slow down workflow unless managed by a trained team member.
Typically, dentists or trained staff members operate DSLRs due to the technical nature of the equipment. Some modern DSLR systems have been simplified with presets to make them more user-friendly.
Intraoral Cameras
Intraoral cameras offer a plug-and-play setup that integrates seamlessly into dental practice management software like DEXIS or EagleSoft. This integration makes them highly efficient for routine use during patient exams.
They can be operated by any team member with minimal training, allowing for quick capture of images without interrupting the flow of patient care.
Image Quality and Resolution
DSLR Cameras
DSLR cameras are renowned for their high image quality and resolution. Equipped with large sensors, they capture detailed images with accurate colors, performing well even in low-light conditions.
The ability to interchange lenses, especially when using macro lenses, allows for close-up shots with excellent clarity, making DSLRs suitable for comprehensive dental documentation, including full-face shots and detailed intraoral images.
Intraoral Cameras
Intraoral cameras are designed for capturing clear images inside the mouth, providing good resolution for diagnostics like identifying cavities, cracks, and plaque. While not matching DSLR quality, they excel at reaching difficult areas and showing real-time visuals that help patients understand their dental health.
Patient Engagement
DSLR Cameras
DSLR cameras provide high-quality images ideal for showcasing detailed before-and-after comparisons, especially in cosmetic or orthodontic treatments. These images help patients visualize potential improvements in their smiles, making them valuable for consultations where aesthetics are a priority.
Since processing DSLR images (including capture, transfer, editing, and storage) can take several minutes in imaging software, these photographs are generally viewed a little later in the visit, rather than in real-time.
Patients may appreciate seeing these detailed images when reviewing treatment outcomes or plans, but they don’t get the instant feedback that’s possible with intraoral cameras, which display images immediately on a monitor.
Intraoral Cameras
Intraoral cameras excel at engaging patients by providing immediate, real-time views of their oral health. Patients can see close-up images of areas like cavities, gum inflammation, or plaque buildup, helping them understand the current state of their mouth.
This instant feedback often leads to better communication between the dentist and patient, making it easier for patients to understand the need for treatment. By visually seeing issues as they’re being discussed, patients are more likely to accept recommended procedures.
Cost Considerations
DSLR Cameras
Investing in a DSLR setup for dental photography involves purchasing a camera body, macro lens, and ring flash, with costs ranging from $1,750 to $4,850, depending on the chosen model and accessories. This higher initial investment provides flexibility for both intraoral and extraoral photography.
Intraoral Cameras
ProDENT offers a range of intraoral cameras that are generally more affordable than DSLR setups. For instance, the ProDENT HD Intraoral Camera PD760 is priced at $349, providing high-definition imaging suitable for dental diagnostics.
These devices often integrate seamlessly into existing dental software systems without the need for extra accessories, resulting in fewer ongoing costs.
Advance Your Dentistry with ProDENT’s Imaging Solutions
ProDENT’s sophisticated intraoral cameras transform dental imaging with crisp, high-definition visuals, easy integration with dental software, and user-friendly operation. Crafted for accuracy and patient comfort, these devices enable practitioners to make precise diagnoses while offering patients immediate, clear insights into their oral health.
Offering both simplicity and affordability, ProDENT provides solutions that enhance the quality of care in your practice. Browse our innovative selection today and elevate your dental services. Visit ProDENT’s store to find the essential tools your practice needs!
DSLR Camera vs. Dedicated Intraoral Camera FAQs
How do you avoid cross-contamination with dental cameras?
Intraoral cameras are designed for easy disinfection, often using disposable barrier sleeves for quick cleaning between patients. DSLR cameras, with their complex structure, can be harder to fully sanitize, posing a higher risk for cross-contamination in a clinical setting. Using proper protocols, like barrier covers, is non-negotiable when using DSLRs in patient care.
Do DSLR cameras support real-time viewing on monitors?
Yes, DSLR cameras can support real-time viewing on monitors through a feature called “Live View.” This function allows the camera’s sensor to send a live video feed to the LCD screen or an external monitor, enabling immediate viewing of the scene being captured. However, it’s more complicated to set this up. You need to connect the DSLR to a monitor using an HDMI cable, activate the Live View mode, and the live feed will display on the monitor.
How does each camera perform in low-light conditions?
DSLR cameras handle low-light conditions well with adjustable settings like ISO and aperture, allowing flexibility in various lighting environments. In contrast, intraoral cameras come with built-in LED lights that effectively illuminate the mouth, making them suitable for quick intraoral views without needing external lighting adjustments.
Back to Top: DSLR Camera vs. Dedicated Intraoral Camera
The best point-and-shoot cameras for dental photography offer high-resolution imaging, precise autofocus, accurate color representation, and reliable zoom with stabilization for clear intraoral and extraoral photos. Look for intuitive operation and sharp, true-to-life visuals for seamless diagnostics and documentation.
You don’t need a fancy DSLR camera with a macro lens to be able to take good dental photographs. While we recommend investing in a high-quality intraoral camera for inside-the-mouth shots, you can get excellent extraoral shots with a point-and-shoot camera.
Our experienced staff here at ProDENT have put together a list of the best point-and-shoot cameras in 2024 for dental photography. If you’re new to taking dental pictures, try one of these to help you get the hang of taking photos before investing in something more high-end.
Key Takeaways
- High-resolution cameras are essential for capturing the intricate details of dental photography, enhancing diagnostics and patient communication.
- Powerful optical zoom capabilities enable detailed close-ups of hard-to-reach areas.
- Intuitive features like plug-and-play setups, fast autofocus, and stabilization save time while delivering professional-quality results.
- A camera that performs well both intraorally and externally, with additional video and live-streaming features, offers unmatched utility for dental practices and educational applications.
Best Point and Shoot Camera for Dental Photography 2024: Overview
| Camera Model |
Features |
Price |
| 1. ProDENT PD760 |
— 720p HD resolution
— Up to 4x zoom
— Autofocus (5–55 mm)
— Video capabilities
— Compatible with 50+ dental software
— Easy plug-and-play setup |
$399 |
| 2. Nikon COOLPIX P950 |
— 2160p 4K UHD resolution
— 83x optical zoom
— Manual and autofocus
— Built-in image stabilization
— Excellent video quality (4K UHD) |
$799 |
| 3. Canon PowerShot G7X |
— 2560p 4K resolution
— 4.2x optical, 4x digital zoom
— Auto and manual focus
— Optical Image Stabilizer
— 4K video and live-streaming |
$799 |
| 4. Fujifilm X100VI |
— 40.2 MP resolution
— 1.4x optical, 2x digital zoom
— Subject-detection autofocus
— In-body image stabilization (IBIS)
— Dust/moisture-resistant |
$1,599 |
| 5. Sony RX100 VII |
— 20.1 MP resolution
— 8x optical, 32x digital zoom
— Fast autofocus (0.02 sec)
— Movable screen for versatile angles
— 4K HDR video recording |
$1,299 |
1. ProDENT Dental Intraoral Camera PD760

While the ProDENT PD760 is labeled an intraoral camera, it’s actually extremely versatile. As well as detailed 720p HD images of structures inside the mouth, it can take facial images too — the perfect all-in-one camera for all your dental photography needs.
Compared to many high-end point-and-shoot camera models, this dentistry-specific device is very well-priced. Dentists on a budget will be pleased to know that it’s likely within their budget.
You get a lot of value for your money — this camera is compatible with just about any dental management software, delivers crystal clear images in 720p HD resolution, 4x zoom for those hard-to-reach oral areas, and bonus, it even has video features.
Plus, it’s super simple to set up, and its plug-and-play nature means you can start using it almost immediately with a very slight learning curve. You won’t be able to snap pictures of your office or staff with it, but for the price, you’re getting an advanced dental camera that does its job perfectly.
| Pros |
Cons |
| ✅ Intraoral and extraoral photograph capabilities |
❌ Can’t be used for anything other than dental photography and video |
| ✅ Dental video as well as photography functions |
|
| ✅ Compatible with 50+ dental software programs |
|
| ✅ Easy, hassle-free setup |
|
Key Specs
| Resolution |
720p HD |
| Zoom |
Up to 4x |
| Focus |
Autofocus 5 to 55 mm range |
| Video Capabilities |
Yes |
| Price |
$399 |
2. Nikon COOLPIX P950
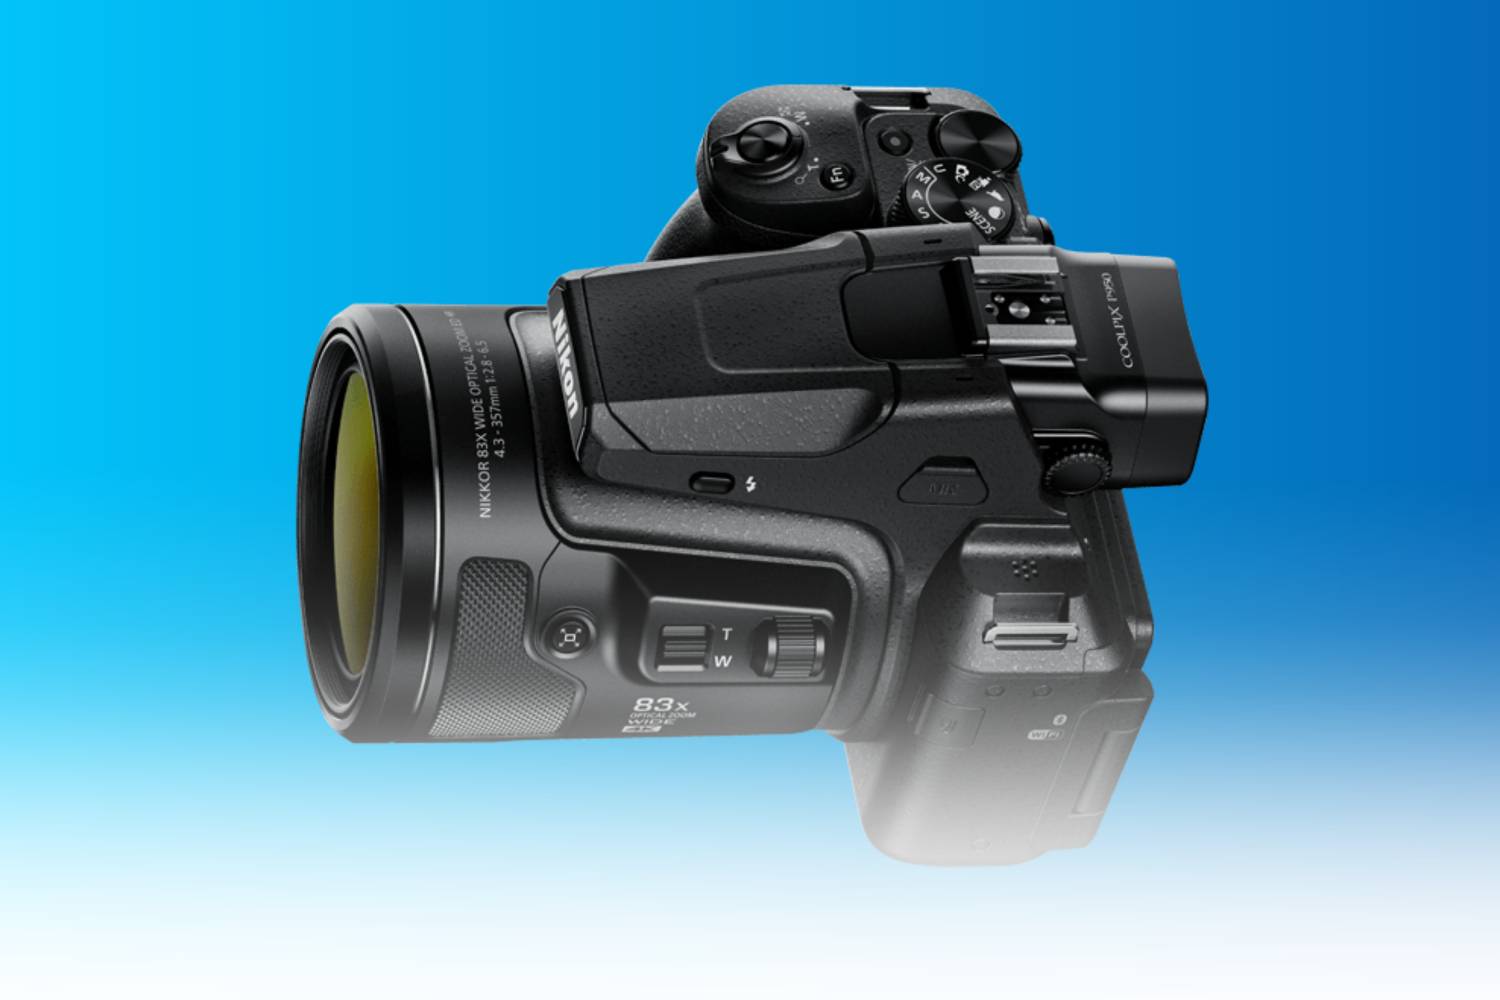
The Nikon COOLPIX P950 is the gold standard in point-and-shoot cameras. It’s ideal for dental photography, both inside the oral cavity and externally. Plus, you can use it for any other photography necessary, so there’s a lot of value here.
First up, the resolution is spectacular. 4K UHD is four times better than full HD, so you can expect sharp, detailed image quality on every shot. The same goes for video, which produces 4K UHD footage no matter how far you’re zoomed in.
Speaking of zoom, there’s an astounding 83x optical zoom built into this camera, covering from a wide-angle 24 mm to an incredible 2,000 mm. Whatever you need to photograph intraorally, the P950 can handle it in perfect detail.
And if that wasn’t enough, it supports up to 6400 ISO for excellent performance in low-light conditions. Plus, it comes with built-in image stabilization, so shaky hands will never be a problem if you’re shooting handheld.
| Pros |
Cons |
| ✅ Exceptional resolution, 4K UHD (4x full HD) |
❌ Pricey in comparison to some others |
| ✅ 83x zoom means you can get perfect macro photos intraorally |
❌ Could be too complicated for some users |
| ✅ Excellent video quality |
|
| ✅ Built-in image stabilization |
|
Key Specs
| Resolution |
2160p 4K UHD |
| Zoom |
83x optical zoom |
| Focus |
Manual and auto |
| Video Capabilities |
Yes (4K) |
| Price |
$799 |
3. Canon PowerShot G7X Mark III

Canon fans will enjoy the PowerShot G7X Mark III. For a small, portable device, it has a ton of value and features that make it ideal for use in the dental office.
Its 20.1 MP sensor delivers surprisingly fantastic quality photos with great color accuracy. Easy autofocus and face detection make it even simpler for you to just point and shoot. Moreover, sharing is just as fast thanks to Wi-Fi and Bluetooth connectivity.
The combination of 4.2x optical zoom and 4x digital zoom means you’ll have no trouble zoning in on particular areas, both inside and outside the mouth. Their built-in Optical Image Stabilizer helps you get crystal clear pictures every time.
And with top-quality video and live-streaming included, it opens up new possibilities, especially for teaching dental students.
| Pros |
Cons |
| ✅ Amazing quality images both inside and outside the mouth |
❌ A little pricey (but worth it) |
| ✅ Excellent zoom capabilities for reaching deep into the oral cavity |
|
| ✅ Good color accuracy and noise reduction |
|
| ✅ Comes with Optical Image Stabilizer |
|
Key Specs
| Resolution |
2560p 4K |
| Zoom |
4.2x optical zoom, 4x digital zoom |
| Focus |
Auto and manual |
| Video Capabilities |
4K 30p / FHD 120p video, live-streaming |
| Price |
$799 |
4. Fujifilm X100VI

The Fujifilm X100VI is a great choice for dentists who enjoy photography and want to both capture great dental photos and use their cameras outside the dental office. It comes with a perfectly good resolution of 40.2 MP, giving you excellent images every time. If you’d like to start including video in your dentistry record files, then you’ll also love the high-speed, impressive-quality video capabilities.
As a nice bonus, the Fujifilm X100VI is resistant to dust and moisture, so there is no need to about it possibly getting damaged during use in the dental clinic. Aside from dental benefits, the camera comes with built-in analog effects like a grain effect and color chrome effect, which can take your photography to a whole new level. You can also buy lenses to attach to the camera body.
| Pros |
Cons |
| ✅ High resolution delivers excellent quality images every time |
❌ This camera is pricey |
| ✅ Video capabilities for more dental record options |
❌ Less zoom than others |
| ✅ In-body image stabilization (IBIS) system for always-clear pictures |
|
| ✅ Dust- and moisture-resistant so you can use it in the office without worry |
|
Key Specs
| Resolution |
40.2 MP |
| Zoom |
2x digital zoom, 1.4x optical zoom |
| Focus |
Subject-detection autofocus |
| Video Capabilities |
Up to 4K/60p and high-speed 1080/240p |
| Price |
$1,599 |
5. Sony RX100 VII

The Sony RX100 VII may be small, but it’s mighty! Despite its size, it features an impressive 20.1 MP resolution and really gives dentists a lot to work with thanks to 8x optical zoom and 32x digital zoom. Whatever you need to take photos of inside the mouth, it’s got you covered.
We like that it’s got a movable, tilting screen. This means you can wrangle the camera as you wish to get pictures from different angles, while still being able to see what’s in your viewfinder. Along with the excellent sharpness, this is a recipe for great dental images.
Fast autofocus adds an element of ease to your photo-taking, and the video capabilities are exceptional should you need them. All in all, it’s a very versatile camera that can handle intraoral, extraoral, and even in-office photographs.
| Pros |
Cons |
| ✅ Amazing zoom allows you to get great intraoral photos with this camera |
❌ Premium pricing might not be accessible to everyone |
| ✅ Fast autofocus makes it easy to lock onto the parts of the mouth you need |
❌ Compact size may be uncomfortable for people with medium to large hands |
| ✅ Movable screen allows you to take images from various angles |
|
| ✅ Stabilization feature keeps your images as sharp as possible even if shooting handheld |
|
Key Specs
| Resolution |
20.1 MP |
| Zoom |
8x optical zoom, 32x digital zoom |
| Focus |
Fast autofocus (0.02 seconds) |
| Video Capabilities |
4K HDR recording and live video output |
| Price |
$1,299 |
Best Point-and-Shoot Cameras Buying Guide
There’s no such thing as the best camera for dentists — it all depends on your specific needs. Here’s what to look for when shopping for a point-and-shoot camera for dental photography.
Excellent Resolution
Your chosen camera’s resolution needs to be the highest quality you can manage. Image sharpness is of utmost importance in dental photography, so the higher the resolution, the better.
Autofocus Precision
A good dental photography camera should have effortless autofocus. This allows you to pay undivided attention to the patient’s mouth and capture the necessary images without the stress of trying to manually focus on oral structures.
Color Accuracy
Choosing a camera that displays accurate color is important. In a world where off-color gums or teeth can equate to oral disease, accurate color representation is a must.
While you may understand the patient’s unique oral health situation, other dentists who don’t know your patients should be able to look at their images and know right away what their problems are. Inaccurate color could make that difficult.
Reimagine Dental Care with ProDENT's Innovative Imaging Tools
ProDENT’s advanced intraoral cameras redefine dental imaging with high-resolution visuals, seamless software integration, and effortless usability. Designed for precision and patient comfort, these tools empower practitioners to diagnose confidently and engage patients with clear, real-time visuals of their oral health.
From plug-and-play convenience to affordability, ProDENT offers solutions that elevate dental care standards. Explore our cutting-edge range today and take your practice to the next level. Visit ProDENT’s shop and discover the tools your practice deserves!
Best Point and Shoot Camera for Dental Photography FAQs
What other equipment do I need to take high-quality dental photographs?
We recommend a ring flash, retractors, and a tripod to enhance your digital dentistry images. It’s also a good idea to invest in an extra battery and memory card.
What's the difference between a point-and-shoot camera and a DSLR camera?
A point-and-shoot camera is a compact, user-friendly camera with a fixed lens and simple controls. It automatically adjusts settings, making it easy for beginners but limited in manual control and image quality.
On the other hand, a DSLR (Digital Single-Lens Reflex or digital SLR) camera has interchangeable lenses and advanced manual controls. It uses a mirror and optical viewfinder for precise framing and generally provides higher image quality.
Is a point-and-shoot camera the same as a mirrorless camera?
No, a point-and-shoot camera is not the same as a mirrorless camera. A point-and-shoot is a compact with a fixed lens. Even though it doesn’t have a mirror, it’s missing the key feature that sets “mirrorless cameras” apart: interchangeable lenses.
Back to Top: Best Point and Shoot Camera for Dental Photography 2024


